Plumbing may seem daunting, but with the right tools and a bit of knowledge, many common issues can be resolved without calling a professional. Whether you’re looking to save money, enjoy a new hobby, or become more self-reliant, DIY plumbing is a great skill to have. Here’s a comprehensive guide for beginners to tackle basic plumbing tasks safely and efficiently.
Essential Tools for DIY Plumbing
Before diving into any plumbing project, it’s crucial to have the right tools on hand. Here’s a list of essentials:
- Pipe Wrenches: These adjustable wrenches are used for gripping and turning pipes.
- Plunger: A must-have for unclogging drains and toilets.
- Pipe Cutter: Useful for cutting pipes to the desired length.
- Plumber’s Tape (Teflon Tape): Essential for sealing pipe threads to prevent leaks.
- Adjustable Wrench: Handy for tightening and loosening nuts and bolts.
- Basin Wrench: Specifically designed for tightening and loosening nuts under sinks.
- Plumber’s Putty: A pliable substance used to create watertight seals.
- Auger (Drain Snake): Effective for clearing blockages deep within the pipes.
Understanding Your Home’s Plumbing System
Knowing the basics of your home’s plumbing system is vital. Your plumbing system is divided into two main subsystems:
- Water Supply System: This subsystem brings fresh water into your home. The water enters under pressure and is distributed to faucets, showers, toilets, and appliances.
- Drain-Waste-Vent System (DWV): This subsystem removes wastewater and allows air to enter the drainpipes to help water flow out smoothly.
Familiarize yourself with the main shut-off valve for your home’s water supply, as well as individual shut-off valves for toilets, sinks, and appliances. In an emergency, knowing how to quickly shut off the water can prevent significant damage.
Common Plumbing Issues and How to Fix Them
- Unclogging Drains:
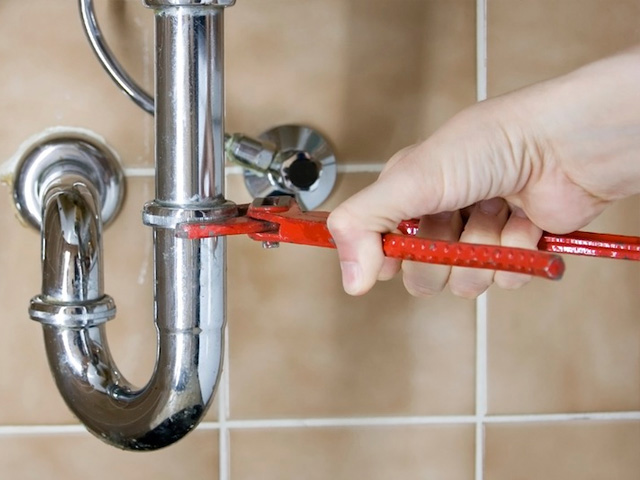
- Kitchen Sink: A clogged kitchen sink can often be fixed with a plunger. If that doesn’t work, remove the P-trap (the curved section of the pipe) under the sink and clear any debris.
- Bathroom Sink: Hair and soap scum are common culprits. Use a drain snake to remove the blockage. Regularly cleaning the drain stopper can also prevent clogs.
- Bathtub: Use a drain snake to remove hair and debris. Chemical drain cleaners can be effective but use them sparingly to avoid damaging pipes.
- Fixing Leaky Faucets:
- Identify the type of faucet (compression, ball, cartridge, or ceramic disk).
- Turn off the water supply.
- Disassemble the faucet and replace any worn-out washers, O-rings, or seals.
- Reassemble the faucet and turn on the water to check for leaks.
- Repairing Running Toilets:
- Check the flapper valve. If it’s worn out or damaged, replace it.
- Adjust the chain if it’s too short or too long.
- Ensure the float is set at the correct level to maintain proper water level in the tank.
- Sealing Pipe Leaks:
- Turn off the water supply.
- Dry the area around the leak.
- Use plumber’s tape to wrap the threads of the leaking pipe.
- For larger leaks, consider using a pipe repair clamp or epoxy putty.
Installing New Fixtures
Installing new plumbing fixtures like faucets, sinks, or toilets can be a rewarding DIY project. Here’s a basic guide:
- Faucets:
- Turn off the water supply.
- Remove the old faucet by loosening the nuts and bolts underneath.
- Install the new faucet according to the manufacturer’s instructions, ensuring all connections are tight.
- Sinks:
- Turn off the water supply and disconnect the plumbing.
- Remove the old sink and clean the area.
- Install the new sink and reconnect the plumbing, making sure all seals are watertight.
- Toilets:
- Turn off the water supply and flush to empty the tank.
- Disconnect the water line and remove the old toilet.
- Install a new wax ring on the flange.
- Place the new toilet on the flange, secure it with bolts, and reconnect the water line.
Safety Tips for DIY Plumbing
- Turn Off the Water: Always shut off the water supply before starting any plumbing project to avoid flooding.
- Wear Protective Gear: Gloves, goggles, and knee pads can protect you from injuries.
- Use the Right Tools: Using improper tools can damage fixtures and pipes.
- Follow Codes and Regulations: Ensure your repairs comply with local plumbing codes. This is particularly important for more complex tasks like installing new pipes.
- Don’t Over-Tighten Connections: Over-tightening can damage pipes and fittings, leading to leaks.

When to Call a Professional
While many plumbing tasks can be handled by a DIY enthusiast, some situations require professional expertise:
- Major Leaks or Flooding: If you can’t control the water flow, call a plumber immediately.
- Sewer Line Issues: Problems with the main sewer line require specialized equipment and expertise.
- Water Heater Repairs: Water heaters can be dangerous to work on due to the combination of electricity, gas, and water.
- Extensive Re-Piping: Replacing a large section of your home’s plumbing system is best left to professionals.
Conclusion
DIY plumbing can be a fulfilling and cost-saving endeavor when approached with the right knowledge and tools. By understanding your home’s plumbing system and learning how to tackle common issues, you can confidently handle many plumbing repairs and installations. Remember to prioritize safety and know your limits—sometimes calling a professional is the best course of action. Happy plumbing! If you want to find great DIY plumbing tips and ideas for beginners, visit hi-techplumbingandair.com/plumbing-boynton-beach/ to learn more.